Uploading data
- In Projects page locate the ACTIONS box at the top left corner.
- Click on 'Add Data' to add a dataset to this project
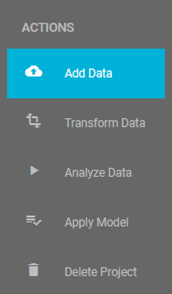
ACTIONS options in project window, prior to the upload of any dataset
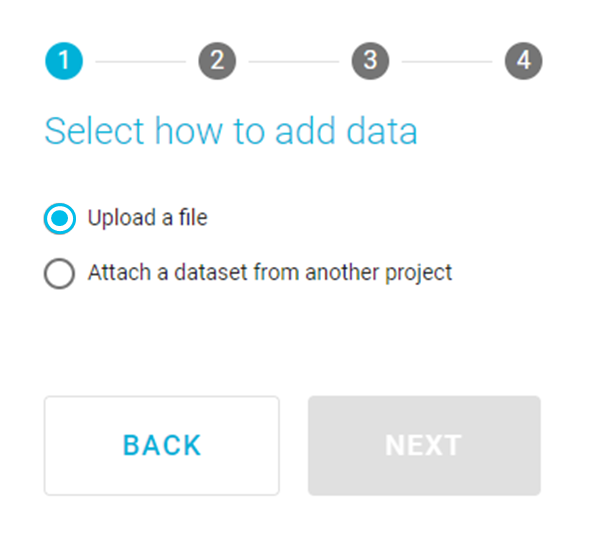
Step 1 & 2 - How to upload a file
Next, you will be given two options. Either to 'Upload a file', or 'Attach a dataset from another project' such as the JAD Use cases project.
- Click on 'Upload a file' radio button.
- Click 'NEXT' to continue.
Select how to add data - Upload
- You can either drag & drop your file in the box, or
- Click on 'BROWSE' button to select the file from your local disk.
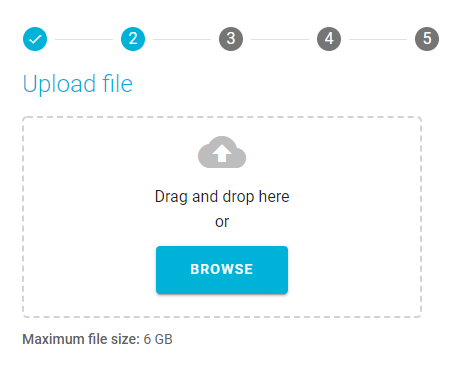
Upload file
- Once the file is successfully uploaded, JADBio will inform you about the number of rows and columns of your dataset. (If your dataset doesn't meet the required specifications, it won't be uploaded correctly.)
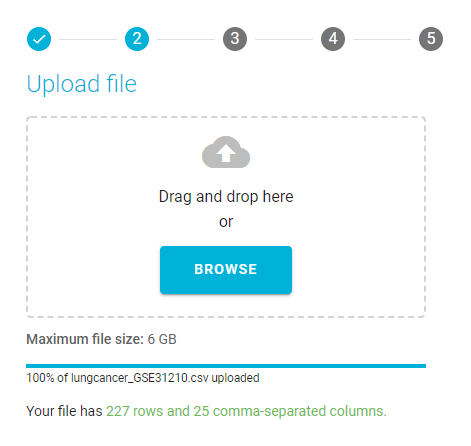
Successful data upload
Click 'NEXT' to go to the next step.
Step 3 - Setting up Rows & Columns layout
JADBio will now ask you to specify the file layout regarding the feature and sample names. By JADBio's
convention, the tabularized data are expected to have samples in rows and features in columns. If your file includes
a header row with the feature names, you should click on the corresponding toggle button, while you should proceed
similarly if sample names are also present in your file. If your file has rows and columns reversed, you can transpose
your uploaded data to match the JADBio convention (samples in rows, features in columns).
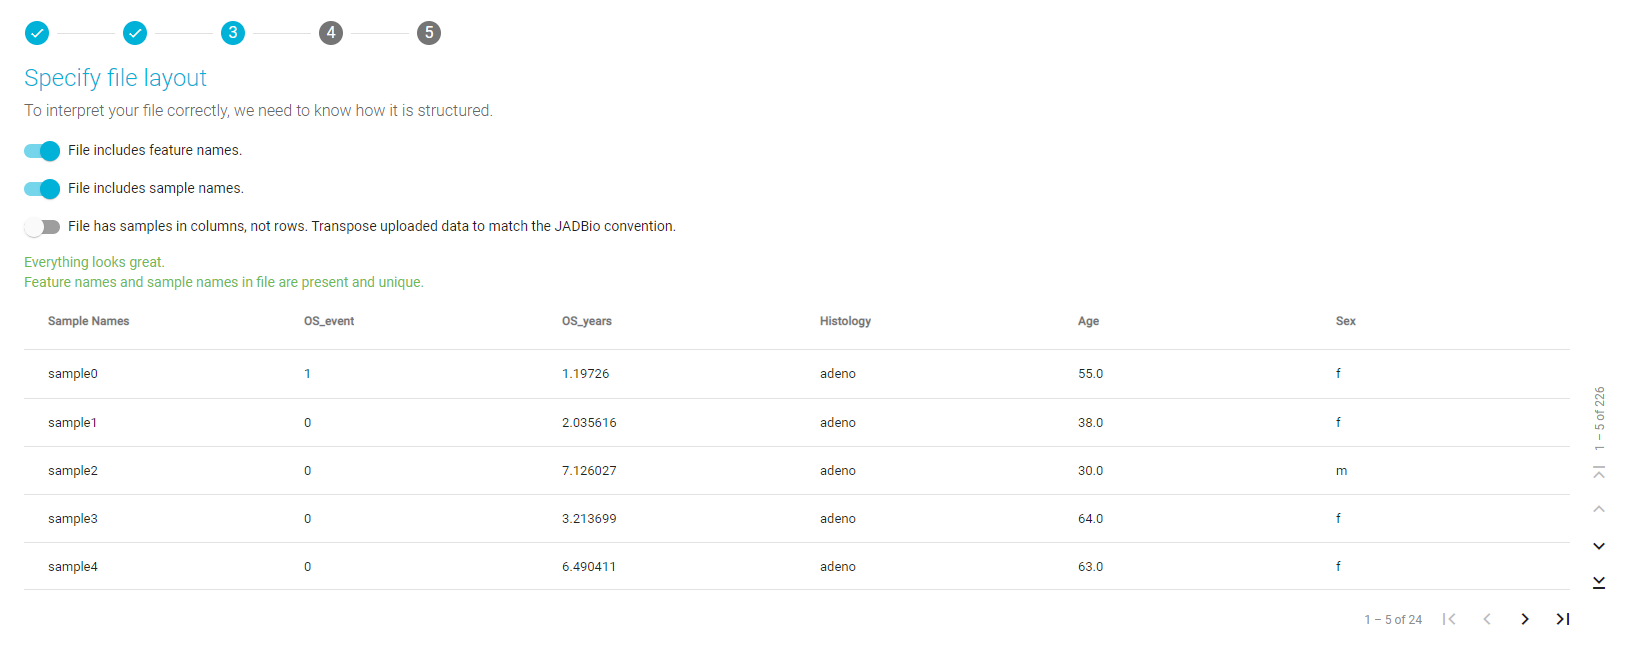
Specify file layout
Click 'NEXT' once you are satisfied with the layout and go to the next step.
Step 4 - Writing a name and a description for your dataset
In the next step, the Assign name and a description window opens. Here, you are able to change your dataset's name and add a brief description.
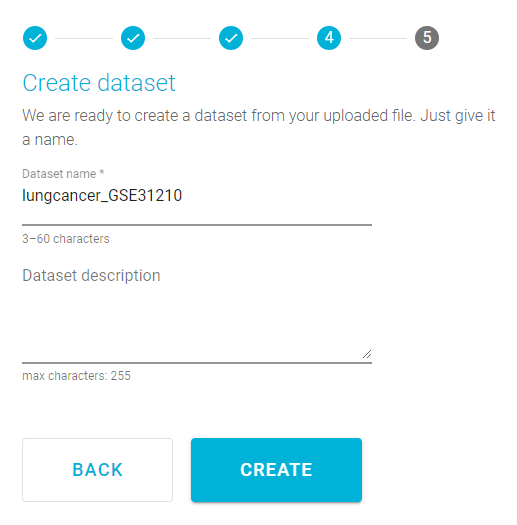
Create dataset
Warning
Your dataset's name should be between 3 to 60 characters long.
- Click 'CREATE' in order to add this dataset to your project.
Note
In JADBio, you can rename datasets from the DATASET DETAILS sidebar.
Note of appreciation to JADBio users
We constantly make changes in the software and do our best to update these materials, but you may notice some differences. We welcome your feedback on how to make this more useful for you and requests for future tutorials.